


Pool Pergola Kits
Transforming your pool deck into a stylish oasis is easy with the addition of a pool pergola kit. These elegant structures provide much-needed shade on sunny days, elevate the look of your pool area, and offer a comfortable space to lounge and entertain. For the DIY homeowner, adding a pool pergola kit to your property can be a satisfying project that also increases your home’s value. We’ll walk you through everything you need to know about pool pergola kits—from selecting the right one to highlights on the installation process. Whether you’re an experienced DIYer or new to home projects, you’ll find value in learning how a pergola can make your house stand out and create a functional, picturesque outdoor living area.


Pool Pergola Kits Make Your House Stand Out
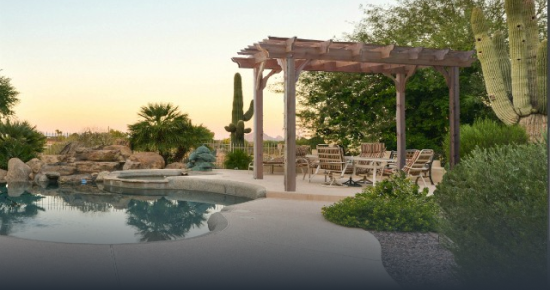
Imagine lounging by your glimmering pool on a hot summer’s day, soft rays filtering through the pergola roof —a serene scenario that could grace your backyard. Enter the world of pool pergola kits, an approachable luxury that is as much about aesthetic charm as it is about comfort. This piece will shed light on how wood pergolas can revolutionize the way you experience your outdoor space.
A pool pergola kit is more than a mere addition to your pool area; it’s a transformative element that elevates your outdoor environment. But what tangibles do these stylish structures provide?
Enhancing Aesthetic Appeal
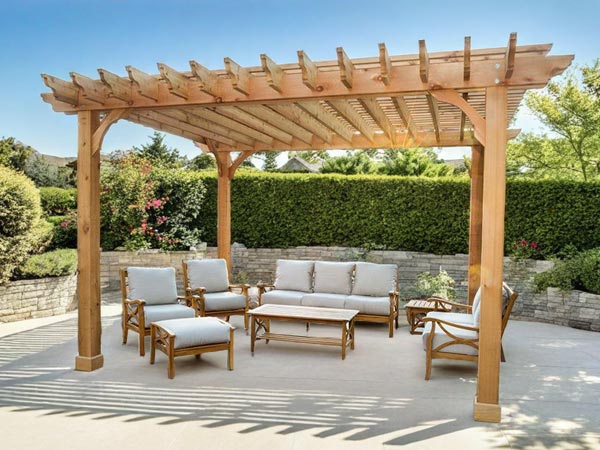
Your pool area should be your personal oasis, and pergolas contribute an architectural element that pairs perfectly with ripples of water. With their clean lines and customizable designs, pool pergolas serve as a visual anchor that complements the natural beauty of your home’s exterior.
Providing Shade and Protection
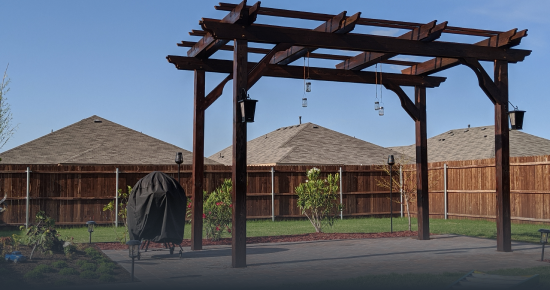
Despite loving the warmth of the sun, everyone needs respite from its scorching rays—the dual function of beauty and utility at its best. Pergolas are designed to offer an idyllic shaded spot, allowing you and your guests to bask outdoors without the burn. Not only do they protect your favorite people, but can also offer coverage over your outdoor kitchen. Poolside grill pergola kits add another dimension to your outdoor retreat as well as protection from the elements.
Increasing Property Value
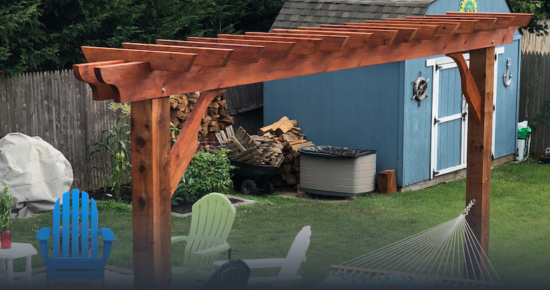
Think of a pool pergola kit as an investment—not only in your current quality of life but in the overall valuation of your property. Wood pergola kits are elegant structures that can be a striking feature that sets your property apart in the real estate market.
Browse DIY Pool Pergola Kits
The Big Kahuna
Classic and Elegant Design
- Maximum Sun Coverage Pergola
- Base Price Range: $$$$
- Available Sizes: 90 standard + custom sizes
The Sombrero
Sophisticated Structure for Partial Shade
- Medium Sun Coverage
- Base Price Range: $$$
- Available Sizes: 90 standard + custom sizes
The Melbourne
Traditional Pergola Style for Modern Designs
- Light Sun Coverage
- Base Price Range: $$
- Available Sizes: 90 standard + custom sizes
The Fedora
Light Sun Coverage, Dramatic Impression
- Light Sun Coverage
- Base Price Range: $$$
- Available Sizes: 90 standard + custom sizes
The Brim
The Charming Backyard Accent
- Border Pergola
- Base Price Range: $$
- Available Sizes: 90 standard + custom sizes
The Visor
A Charming Backyard Accent
- Accent Pergola
- Base Price Range: $
- Available Sizes: 90 standard + custom sizes
How Does Getting a Pool Pergola Work?
Are you dreaming of adding a stylish and functional pool pergola to your outdoor oasis but not sure how? In this section, we’ll walk you through how your new pool pergola will be packaged and shipped as well as tips for installing – whether it’s one of our deck pergola kits or patio pergola kits.
How Do Pool Deck Pergolas Get Shipped (And Delivered)?
Once we’ve crafted your new pergola kit, we carefully crate it and make it secure for shipping and delivery. We custom build a pallet that goes under each kit, stack the pergola pieces on the pallet, then strap the pieces down and build crating around the outside to protect the lumber. Here are a few tips to prepare for receiving your new pergola. For Big Kahuna, Big Kahuna PLUS, Big Kahuna Solar-ready, Sombrero, Melbourne, Fedora, Brim, and Visor pergola kits: the kit will arrive on the back of a semi truck and you will need to hand unload it piece by piece. The driver is not required to help unload it, but some do provide some assistance. You will need to have 2-3 healthy adults available to help unload the pergola (2-3 healthy adults can typically unload a standard size kit in about 20-30 minutes). Bring gloves, a tool to cut the strapping from the crate (scissors or knife), and possibly a screw gun with a Phillips bit to uncrate the lumber. Every kit is crated a little differently due to the different sizes of pergola kits available. Not all crates will need to have screws removed but those that do will usually have 4-6 screws to take out in order to remove the pergola pieces from the crate. You’ll need to plan to dispose of the crating material, as the drivers are not required to remove the crating.


How to Install My Pergola on a Deck
Embarking on the creation of your own backyard oasis with a pergola can be as rewarding as it is challenging. If you’re planning to install your pergola on your deck, you can consider hiring someone to help with the installation. If you decide to bring in a professional, check our Installation Directory to see if there’s a contractor in your area that’s also a member of our contractor program that meets your project requirements. If not, seek out a local and reputable general contractor or handyman/woman who has experience with outdoor structures or general carpentry, or a hardscape/landscape professional. This will ensure that your pergola is not only aesthetically pleasing but also structurally sound. On the flip side, if you’re inclined towards a hands-on approach, and you have some carpentry or construction knowledge, a DIY pergola project can be an enriching experience that puts your craftsmanship to the test. Rest assured, with our DIY pergola kits, we’ve taken a lot of the guesswork out of the process of building a pergola. Our kits are pre-cut, pre-drilled, and include comprehensive instructions that guide you through each step. Whether you choose the expertise of a seasoned builder or the satisfaction of DIY, your dream pergola is within reach.
How To Install My Pergola On Concrete
The most common pergola installation around a pool is on top of an existing concrete slab. With our DIY pergola kits, we offer the option to add the necessary hardware to your order for installing your pergola posts on concrete, on a footer, or in the ground. This section provides the primary steps for installing your pergola on concrete. Review these steps to determine if you’d like to try the installation yourself, or if you prefer to hire a local handyman or contractor to assist with your pergola installation.
Select the option to include post mounting hardware with your pergola posts. This can be selected when you choose your post height. We offer 8’, 10’, and 12’ posts, and can also cut them to a custom size in between those lengths upon request if needed. For installing on top of a concrete slab, we recommend the 8 foot or 10 foot post option, and selecting the posts with hardware option.
If you are installing on a concrete foundation, we recommend you use galvanized steel post bases on each post secured with concrete anchors. For our pressure treated pine kits, we recommend you also install one Tapcon concrete screw in each post base to prevent twisting of the post while drying. The post bases, anchors and Tapcons are included with your kit if purchased with the option to be installed “on a concrete slab or footer”. If you did not select this option, these can be purchased from your local hardware store.
The post mounting hardware will connect the pergola posts to the slab, and will hold the bottom of the post up 1″ from the concrete surface to keep the bottom of the posts out of water that may accumulate on the patio.
Follow these steps to install your pergola posts on concrete. More details for each step are included with your pergola kit and are shown on our Installation Information page.
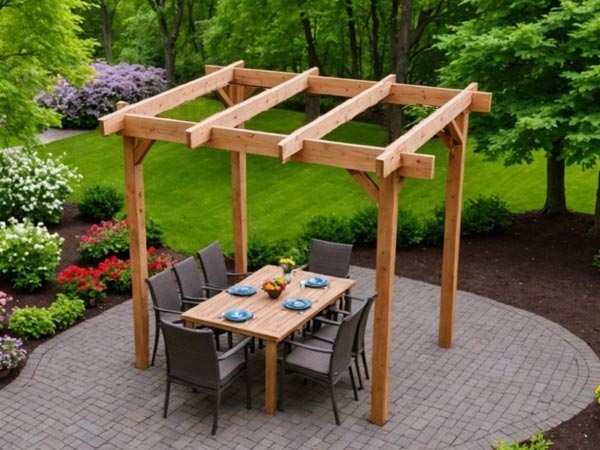
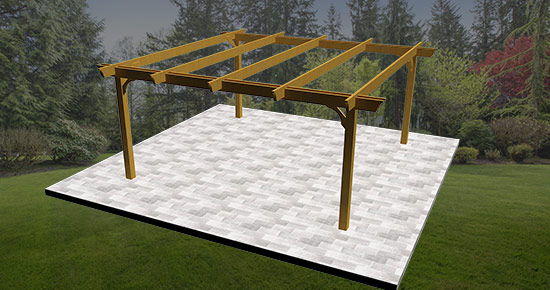
Step #1. Lay all parts out
Step #2. Place all four beams on the ground exactly where you would like the pergola to stand
Step #3. Slide two rafters down onto the beams
Step #4. Make it square. Now you can see where you’ll mount your post bases.
Step #5. Make a mark on the concrete directly in the center of the lines where it says “post” on all four corners if installing using post bases on top of an existing concrete foundation or previously poured footings.
Step #6. Place the bases on the concrete in the exact position where they will be installed.
Step #7. Find the center of the hole on the bottom of the base, mark that point, and drill into the concrete with a 5/8” concrete drill bit at least 4” deep. Clear excess debris from the hole. Place the washer and nut on the concrete anchor, place the flared end into the hole in the concrete, and hammer it down until it is against the post base, but do not tighten. Repeat for each base.
Step #8. Before tightening the anchor to the post base, make sure that each base is square to the outside edge of your pergola footprint. Lay one of the beams or rafters (depending upon length needed) on the ground directly outside two of the post bases, then rotate the post bases until the outside edges of each base are touching and square with the board. Repeat this for the other bases.
Step #9. Once square, tighten each anchor with a 3/4″ wrench until snug to the base.
This is a high level overview of the installation steps for Pergola Depot pergola kits. Read our Installation Instructions for more detailed instructions and hints and tips for pergola installation. These instructions will be provided with your pergola kit, and you can also reference our pergola post base installation video.
If you’re unsure of how to properly install your posts, we recommend hiring a contractor to assist with your installation. Review our pergola installer directory to see if there is one in your area that meets your project requirements.
FAQs About Our Pool Pergolas
A pool pergola kit becomes a refuge on hot days, offering shade that protects you from direct exposure to the sun’s rays. With a variety of designs, a pool pergola also serves as an architectural focal point that complements your pool’s landscape, a stylish cover for your outdoor kitchen, or a simple structure to provide much needed shade. Here are answers to a few common questions we hear from those who are just getting started with their pool pergola. If you have another question not answered here, call us and we can help you get your pergola process started!
How Do I Measure for a Pergola Next to My Pool?
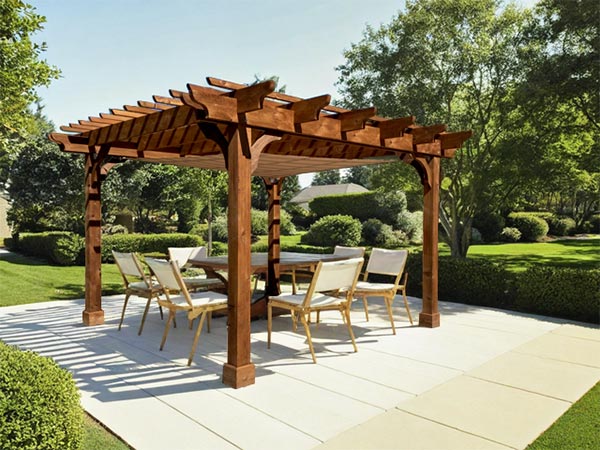
To find the size pergola you need for your poolside retreat, start by measuring the width of the space needed to cover your outdoor dining room or living room where you’ll be spending summer pool days. After you calculate that measurement, add the amount of space you’d like between any furniture, hot tub, hammock, and the inside of the posts. That will be your inside post to post measurement. Next, measure the length of the area where you’re planning to use for your outdoor shade. This measurement will also be important when you decide on the overall tip to tip size.
Now that you’ve calculated the amount of space you’ll need around your patio furniture, you can browse the different standard size pergola kits available. As an example, here are measurements of our 16×20 freestanding pergola kits with 10’ posts. Our 16 x 20 pergolas have an approximate inside post to post measurement of 12 feet x 16 feet, and have 16’ rafters that equate to the pergola depth and 20’ beams that equate to the pergola width. The width of this size comfortably accommodates a dining table and chairs, grill station, or outdoor living room furniture.
If you know you’re mounting the posts on the concrete parking pad, you’ll want to select that option when you select post height. Post mounting hardware will be included with your kit when it ships, so you can rest assured you’ll have all the necessary hardware and wood components to assemble the pergola. When choosing your post height for a pergola you’ll be installing in the ground, make sure you account for frost line and the required post depth you’ll need to accommodate your frost line and that leaves enough room for friends and family to walk around under the pergola.
For assistance in selecting the right size for your pergola, refer to our comprehensive pergola measuring guide, which provides details on width, length, and height. By planning ahead and taking accurate measurements, you’ll be confident that you’ve selected the best size for your space.
Are There Customizations I Can Make to My Pergola?
Our kits are highly customizable – from wood type and color to design specifics like end cuts on your rafters and beams. You can also choose whether you’d like one of our attached pergola kits or our freestanding stand-alone pergolas. With either type, you can choose the amount of shade under the pergola, the height, and the length and width. We offer over 90 standard sizes to choose from, but also have custom pergola kits in odd sizes to fit your unique space.
What are Popular Uses for a Pool Pergola?
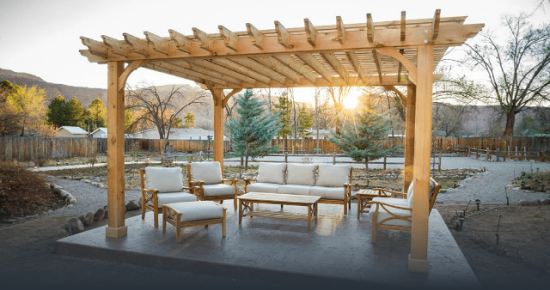
Most pool pergola customers are looking for a structure to install near their pool so they can provide a shaded area for outdoor cooking, dining, or relaxing. Once your pergola is installed you can further customize it with string lights, curtains, or shade sails to add color or an extra lighting feature to your poolside retreat. Pool pergolas are an easy way to enhance any backyard pool setting and to create a space you can enjoy year round.


Order Your Pool Pergola Kit Today
Transform your poolside experience with the perfect pergola! As a pool enthusiast, you understand the value of a serene outdoor shelter. Our collection of pool pergolas offers just that – an elegant enhancement for your leisure and entertaining space. Feel overwhelmed by the choices? Don’t worry! Our dedicated team is on standby to assist you in navigating the variety of sizes and styles to find your perfect match. Imagine your new open-air retreat, as practical as it is visually captivating. Why wait? Start your journey to an idyllic pool oasis. Order your pool pergola kit today, and let us turn your poolside sanctuary dream into a reality.