


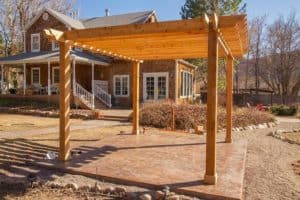
How to Build a Pergola Step by Step
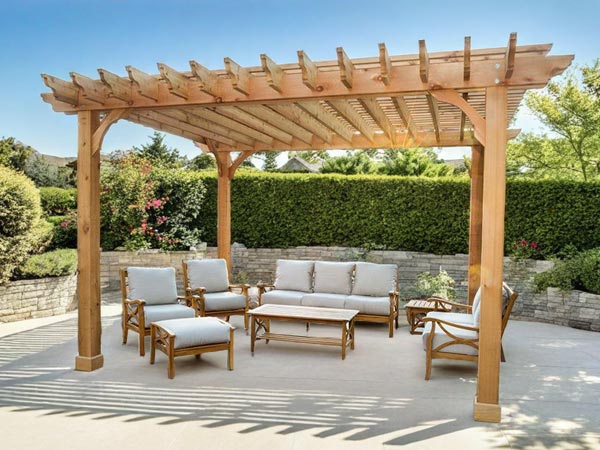
If you've been searching through pages of DIY sites on how to build a pergola, you already know that there many ways to achieve a beautiful backyard dream pergola! Sometimes it's difficult to choose from the countless options out there. As you're wading through detailed how-to plans and assembly instructions, we'd like to offer another option. Have you ever considered taking a hybrid approach to create the ultimate wooden structure for your backyard? Let me introduce you to the game-changer: pre-cut pergola kits. With our pine and cedar pergola kits, you get the best of both worlds, no guesswork involved. We take care of all the time-consuming cutting and drilling, ensuring you have the right materials. Your job will be to measure your space, unload the kit when it arrives, and get your team ready to assemble your new backyard beauty!
DIY Pergola vs Precut Pergola Kit
If you're more about the full DIY experience, take a look through the steps we provided below that can be applied to our pre-cut pergolas or to a build from scratch pergola.
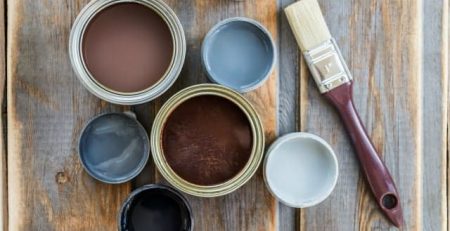
Whichever route you choose, let's touch on the main ingredient: the pergola wood. Choosing the right material for your pergola is crucial, and we've narrowed it down to two top-quality options: pressure-treated pine and rough-sawn western red cedar. Both pergola wood types offer exceptional durability, with pressure-treated pine being ideal for humid climates and rough-sawn cedar performing best in drier environments.
If you're a fan of instant gratification and want to paint or stain your pergola right away, cedar is your go-to. If you opt for pressure-treated pine, you'll need to wait a few months before applying any paint, stain, or sealant.
But before you start, it's essential to plan ahead, measure your space, and gather all the necessary tools and materials. Don't forget to recruit some helpers for your pergola-building journey. With everything in place, you're ready to kick off your exciting pergola project. Let's get started!
Steps to Building a Pergola
If you've embarked on other similar outdoor building projects, you know it's best to lay out your plan. Measure your space, review the materials and tools needed to build a pergola, set up a budget, and then put your plan in motion! The first step is to make sure you have the space for the structure.
Measure the Space to Build a Pergola
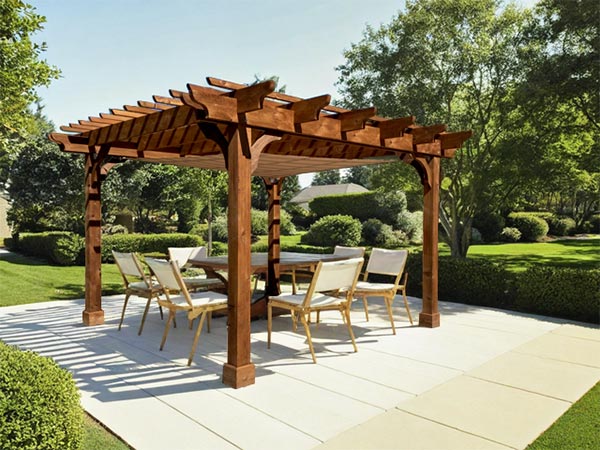
There's something about the way a pergola frames an outdoor space that adds a touch of magic to any garden. Whether it's a small border pergola connecting different areas of your backyard, or a large covered pergola separating the pool area from your outdoor dining room, a well-placed pergola can truly elevate your outdoor oasis. Of course, before you get too carried away dreaming up your perfect pergola setup, there are some practical considerations to keep in mind. For example, how much space do you have to work with? Do you need to take any existing patios or structures into account? Once you've taken stock of your space, though, the fun begins! After you've determined how to measure for a pergola, You can start planning out your perfect pergola - think about the parts of a pergola, how you'll acquire the materials, and pulling together your tools and assembly team.
Review the Parts of a Pergola
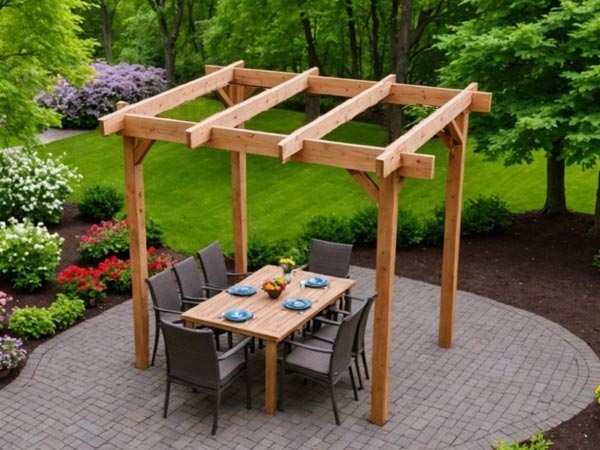
Are you new to the pergola world, or have you been researching and planning for this for months? Either way, let's review the parts of a pergola common to most pergola designs. Then you can make your list of materials required to build your own pergola from scratch, or from a kit as we'll describe here. In the example we're showing, we're including the pergola components you’ll need for a trellis style pergola (these are components that are included in our Brim pergola kits*). These include the following:
- 2x8 Beams (2)
- 2x6 Notched Rafters (3-9 depending upon size)
- 6x6 Posts (2 or 3 depending upon size)
- 2x2 Top Slats
- Hardware
W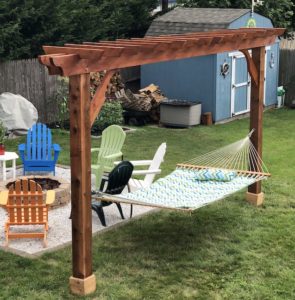 hen you purchase one of our kits, you’ll receive a packing list with a complete list of kit components, including the number of each type of lumber and hardware pack components, and complete installation instructions.
*If you’re looking to build a patio pergola kit with more patio coverage, you'll want to review a pergola parts and installation guide for a full size pergola kit. Typically those include 4 posts (if it is a stand alone pergola), 2 posts (if it's a pergola you want to attach to your house or garage); and a varied number of beams, rafters and top slats. The number of components varies based on the amount of shade you're trying to accomplish with the pergola.
For our precut pergola kits, we include all the lumber and hardware needed to construct your pergola. Optional kit parts include post base trim, post base mounting hardware and Tapcons (for pine kits), bearing board for solar-ready pergola kits, and a ledger board for attached pergola kits that will be installed attached to a wall. Our covered roof pergola kits also include optional metal roofing in a variety of colors.
Once you make your materials list (or choose a kit), you'll want to begin gathering tools and helpers. Building a pergola is a fun and rewarding experience to share with friends and family. Just like other home improvement projects, many hands make light work!
Gather the Tools to Build Your Own Pergola
One of the first considerations when you’re planning to build a pergola is what your pergola materials list will include. What tools are required? How much lumber will you need? Make a plan in the beginning and make sure you have helpers for your pergola project, the proper tools, and supplies needed for digging your footings and installing post bases.
Depending on the type of wood you choose for your pergola will determine if you need additional tools.
Tools and Supplies Needed to Assemble a Pergola:
- Helper* (for larger pergolas, at least 2-3 helpers are recommended)
- Tape measure, hammer, level
- Ladder (tall enough to work the top of your pergola during assembly)
- Screw gun
- Post Hole Digger
- 3/4” Wrench
- For new footings: post hole digger, dry concrete mix, gravel, trowel, shovel and mixing bin or wheelbarrow
- For installing rebar into post (if posts are going into new concrete foundations): drill, 5/8" drill bit
- For all pergola kits using post bases on concrete: drill; 5/8” masonry drill bit; and 15/16” wrench
- For Pressure Treated Pine kits using post bases on concrete: you will also need a 5/32" masonry drill bit, and a #2 Phillips bit or #2 Phillips screwdriver
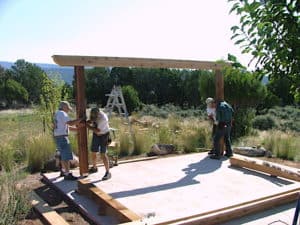
Pergola Installation Steps
This overview gives you a glimpse of the play by play for how to build a trellis or arbor style pergola that you’ll love for years to come. Our border pergolas offer another option for enhancing your backyard living space with a design you can incorporate a hammock or hanging plants. This is a DIY pergola kit for the weekend warrior or a great family project that you'll remember for years to come.
Overview of Pergola Installation Steps
- Lay out the pergola pieces where you would like to install the pergola.
- Lay one beam on the ground and lay the posts (inside the marks that say “post” on our Brim pergola kit) on top of the beam.
- Lay the other beam on top of the posts creating a sandwich with the two beams on the outside and the posts in the middle.
- Insert the four 1/2” bolts with a washer on each through the predrilled holes that go through the beams and posts.
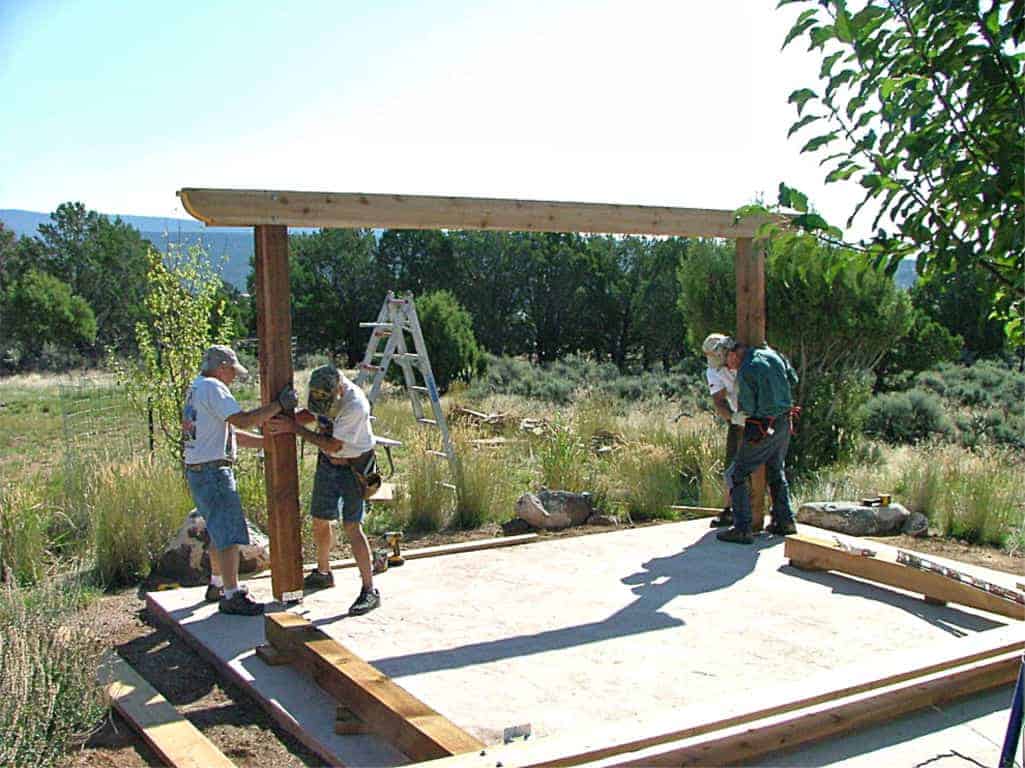
- Now flip the assembly over by lifting the end of the posts up and over while the beam stays on the ground.
- Put another washer and a nut on each of the bolts and tighten with 3/4" wrench.
- Now you are ready to dig your holes. With the assembly laying on the ground, line up the bottom of the posts where you would like the pergola to stand and mark the ground for the center of the post holes.
- Dig the post holes at least 2’ deep and approximately 12” diameter.
- Stand the assembly up and let the posts slide down into the holes.
- Have your helper hold each post plumb while you pour dry concrete in to each hole. Do not water in the concrete yet.
- Make sure the beam is level from post to post. If not, raise the lower side up to the level of the high side and let the dry concrete fill in under the post a bit.
- Once you have everything plumb and level, you can water in the concrete. You may want to chop the water in with a stick or a shovel to get rid of any air bubbles. Make sure while you do this the posts are held plumb.
- Allow the concrete to fully dry, overnight will probably be enough time.
- Install the rafters over the beam, secure using 3” screws provided with the kit into the predrilled holes in the beam.
- If you choose pressure treated pine, do not paint or stain until the wood is dry, typically 2-3 months depending on your climate.
If you’re interested in a building a larger full size pergola, there will be other considerations including space requirements, materials, and steps. Our assembling pergola plans include lots of helpful information to guide you through the process of assembling our pergola kits.
Building a Full Size Pergola
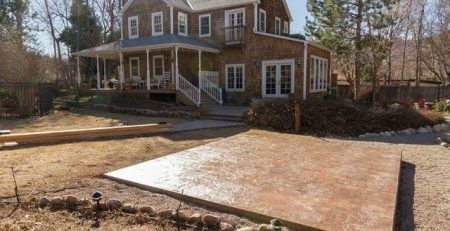
When you build a larger size pergola, you’ll also add a few more pieces and steps. These images show the progression of a full size pergola build. For large pergolas, plan on having about 6 or 7 more steps in your process, including layout of beams, placement of rafters, and proper measurement of post depth and locations.
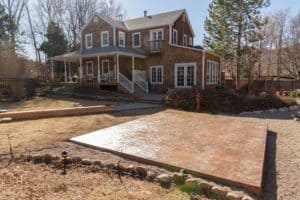
First, you'll want to find pergola measurements and determine the overall tip to tip size you'll want to cover your space. You may have an existing slab or patio all set to go, so that will be the guide to follow for measurements. How close to the edge of the patio do you want your posts to land?
Our pergolas are sized as the tip to tip cover. For example the pergola shown in this progression is a 14x16 Big Kahuna pergola. It's outside post to post dimensions are 11' x 13'. The inside space measures 10' x 12'. The tip to tip measurement is 14' x 16'.
Next, you'll decide what length posts you'll need and how they'll be mounted. How tall do you want your pergola? Do you have an existing slab to consider for mounting the post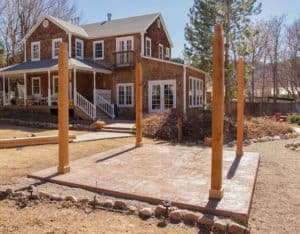 s or are you adding pavers after the pergola? Most people don't want their pergola too tall, but it's a matter of preference.
With our Big Kahuna and Sombrero pergolas, 8 or 10-foot posts suit most situations unless you’re installing your posts more than 2′ in the ground. Smaller kits generally look better with a shorter post. But, keep in mind things like ceiling fans or other accessories, head room for tall people, or covering a hot tub.
Note that to determine the length below ground, we recommend at least 2 feet or more depending upon the frost line and building codes in your area. This is an important step, so be sure you take your time and research post installation information specific to your climate and mounting surface.
If assembling pergola plans seems overwhelming, set your mind at ease and opt for building a pergola from a kit rather than trying to decipher DIY projects for how to build a pergola. With our pine and cedar pergola kits, you get the best of both worlds, no guesswork involved. We take care of all the time-consuming cutting and drilling, ensuring you have the right materials. Sit back and relax as we ship it directly to your location, giving you the satisfaction of building your own pergola with ease. Contact us with any questions about the parts of a pergola you're considering to build your own pergola, we're happy to help!
LOOKING FOR A SPECIAL SIZE PERGOLA? NEED HELP WITH SIZES?
If you need help finding the size and style to fit your space, request a custom pergola kit, shop all pergola kits, or contact us today!
Related Posts

Full Guide on Pergola Staining & Sealing
When is the best time for staining and sealing wood on outdoor structures? In warm climates, winter and early Spring...
DIY Spruce-ups for Wood Pergola Kits and Patio Pieces
Get your outdoor furniture and structures ready for the season! Grab a paintbrush and quickly spruce up your front door,...
How to Measure Pergola Dimensions
Ready to take the big leap and add a backyard pergola to complete your patio design? First step - you'll...
Articles Related to Pergola Kits

A quick PDF guide for buying and customizing wooden pergola kits from Pergola Depot.

Learn how to measure the height and rafter spacing for your pergola kit.

Find out the most common pergola sizes and styles that our customers use.